


More Notan!
I’m finding this Notan quite addictive… so here’s another one.

I cut this one a bit differently. Instead of folding the paper into four before cutting, I only folded it in half; and rearranged a couple of the pieces to break the symmetry. I wasn’t sure which way up it should go, but I think I prefer it with the straight edge to the left. What do you think?
I’m still busy scanning some of the smaller cardboard pieces I created a while ago, so here’s a couple more.
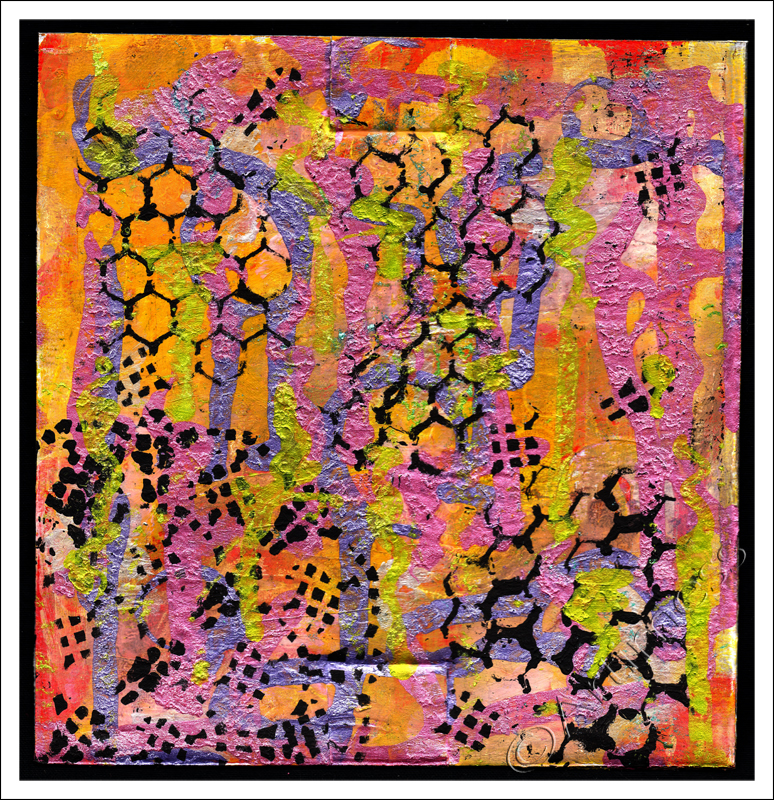
I created this piece on recycled cardboard using acrylic paint, acrylic ink, stencils and homemade stamps.

This is another piece on recycled cardboard created using acrylic paint and acrylic ink. But this one was calling to be blended…

…this is the result – quite dramatic, don’t you think?
![]()
Painting Big!
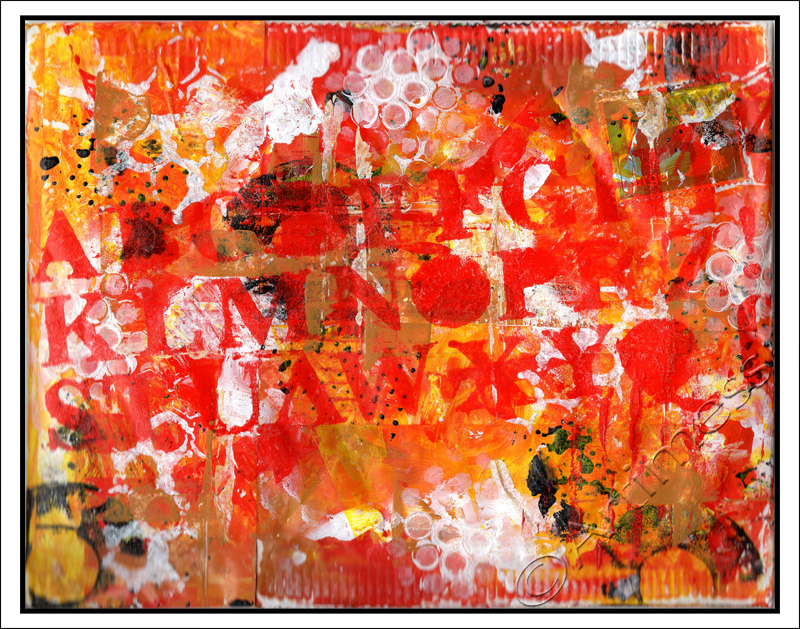
Up until the advent of the new easel, the biggest I had ever painted was a double page in my 12″x9″ Strathmore journal! To be honest, I had never had the courage to try anything bigger. But that’s all changed now! With all the recycled cardboard from moving, I have lots of larger canvases to play on, and because they’re made from recycled cardboard I don’t have the fear of spoiling them that I might have if I’d invested lots of money in expensive canvases! And I’m really loving the freedom of painting big! Every day so far I’ve been adding some more to my 25″x25″ recycled cardboard.

I’ve added more acrylic paint using letter stencils and home made stamps and am loving how it’s looking so far, but have a feeling it still wants some more layers!
Meanwhile, I’ve been playing with some rather smaller pieces as well!

I created this one on recycled cardboard using acrylic paint, stencils, homemade stamps and a paint covered mopping up tissue to add the highlights…

…and this one on salvaged plywood using acrylic paint, acrylic ink and homemade stamps. The only problem with the plywood was that it had quite a pronounced curve from being used to protect the corners of something (I can’t remember what!) and when I tried to flatten it for the scanner it cracked across the top and had to be mended 🙁 …

…and lastly – a little bit of sparkly digital blending – you need to look at the larger version to really see the sparkles.
![]()
Playing With Paint!
It’s less than two days now before we get the keys to our new home and it’s getting to the point where I will have to seal up the boxes with my paint in. But I was determined to have one last play before that happens.

As you can see by the state of my hands, I had a lot of fun!

And this is the new mail art! I really wanted the colour to be all blue, but as you can see… the red and purple just couldn’t help but creep in! I used acrylic paint with stencils and fingers and home made stamps, and lots of layers – so many layers, that I don’t think any of the original envelope shows through at all!
I hope to be back with the paint by the weekend, but till then I’ll be playing with photos and blending and possibly some words!.
![]()
Purple Mail Art!
Four days left and counting! The packing is done except for the last few bits, all the boxes are taped up except for three of my art supply boxes, so we’re almost there!!

Carrying on the addiction, here’s another recycled padded envelope. This one originated from my pen supplier!

I started out with the ‘Fragile’ tape again – I do like how that looks through the paint! Then I added a couple of small gel medium transfers, and followed it up with lots of acrylic finger painting, recycled stamping, homemade stamping and stencilling. I finished off with a little metallic paint drippage. I think this one may have a face lurking in its depths … keep watching to find out!
![]()
Mail Art!
I’m never quite sure what qualifies as ‘Mail Art’. Does it have to be something you make to send through the post, or can it be recycling something that has already been sent through the post? I’m sure someone will enlighten me, but in the meantime, I’m calling what I created today ‘Mail Art’!
We received it in the mail a couple of days ago when it contained some computer memory for a computer Bry is currently repairing. Knowing my acquisitive habits, he gave it to me for recycling. I originally intended to put it with my collection of padded envelopes, but it never got that far. It’s been sitting in a pile on my desk, and this evening when I was wanting to paint something small, it seemed the obvious choice of canvas.
I decorated it using acrylic paint applied with my fingers and an assortment of my recycled ‘stamps’ (sequin waste, old cards, creamer sealers, washers, etc). I finished it off using the waste from a die-cut alphabet as a stencil. I really like how it turned out – maybe I’ll re-use it as an envelope now it’s finished!
![]()
Finally Finished!
At Last, I have finally finished last weeks Life Book 2013 lesson!
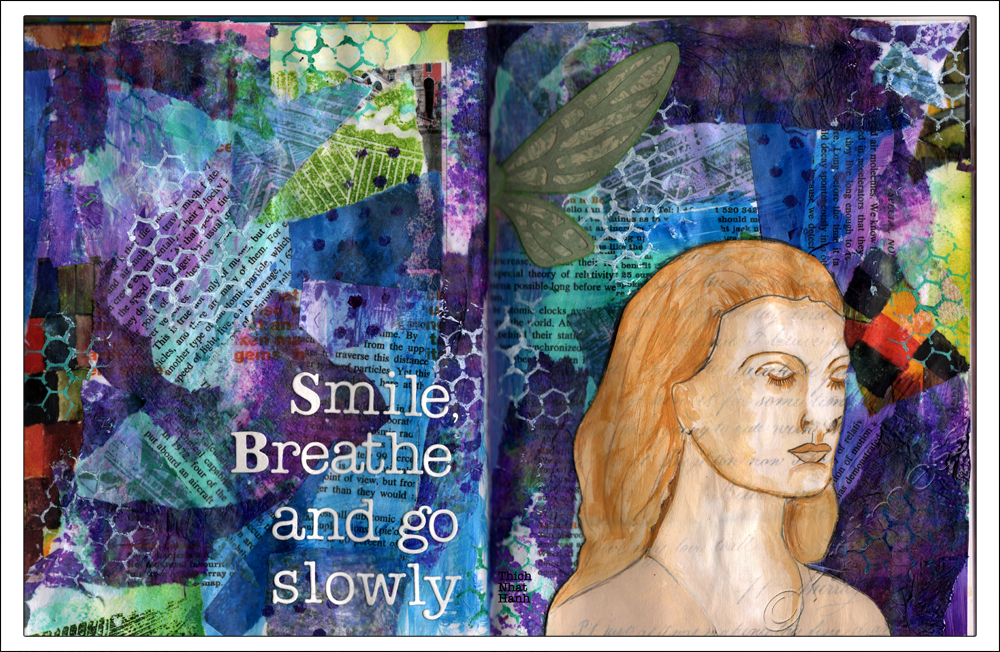
For the final touch I added the Thich Nhat Hanh quotation using die-cut letters.
Now I’m off to pack some more boxes!
![]()
More Layers!
I managed a few more layers last night and was hoping to add some text today but somehow the time eluded me! So here’s the next instalment…
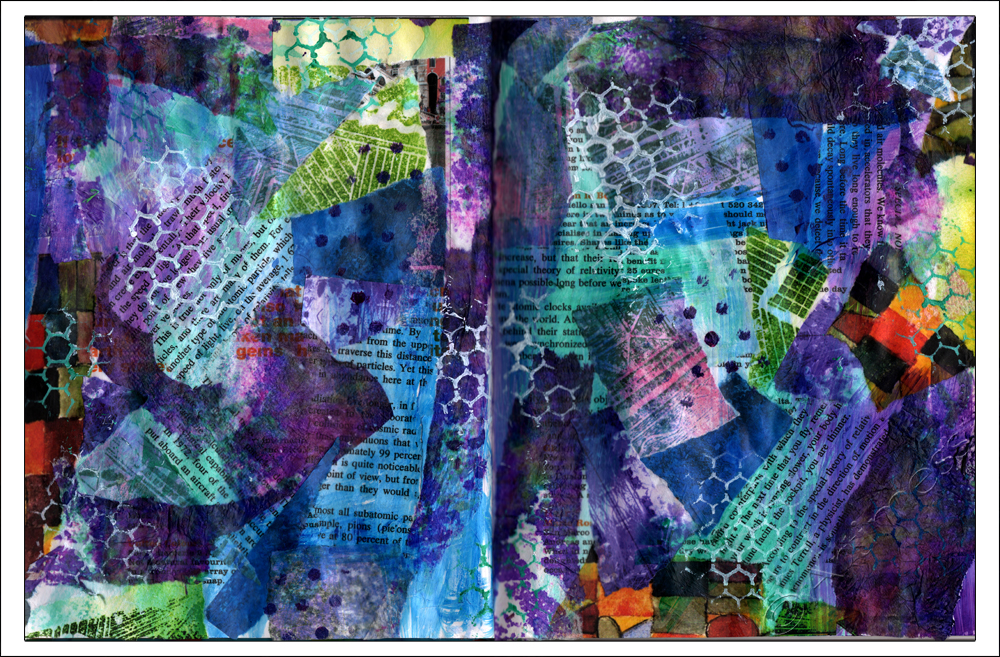
… first I added some layers of acrylic paint and some stencilling…
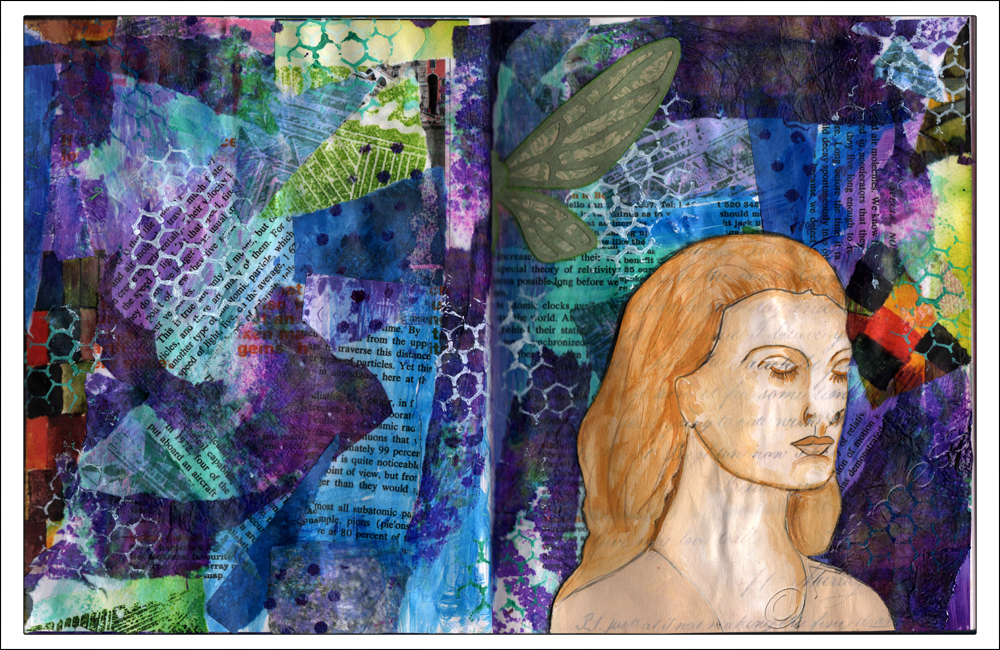
… then I collaged my meditating lady after painting her using acrylic paint and a die-cut dragonfly. It’s taking awhile, but I’m pleased with how it’s looking so far. Hopefully I’ll manage to finish it tomorrow!
Now I’m off to the shops to get some more boxes! Keep watching!
![]()
I Begin…
The 1st of August has arrived bringing with it the start of Effy’s challenge to blogalong with her for 30 days in August. There’s still time to join in if you haven’t already, just click on the link below.

Being a little slow off the mark, I have just decided to join in Effy’s Inner Excavate Along where she is going through Liz Lamoreux’s book Inner Excavation. Effy has nearly finished, but I’m just starting …. O well as Effy says, I own the book so I can work through it whenever I like :).
Anyhow… after reading all the ideas and suggestions in chapter 1, I decided to create a word poem using a few of the words on the pages of my recycled journal. Originally I thought I’d add some joining words between the words on the page, but on reflection, I decided that would be overkill and have bravely left them stark and suggestive. I hope you like them.
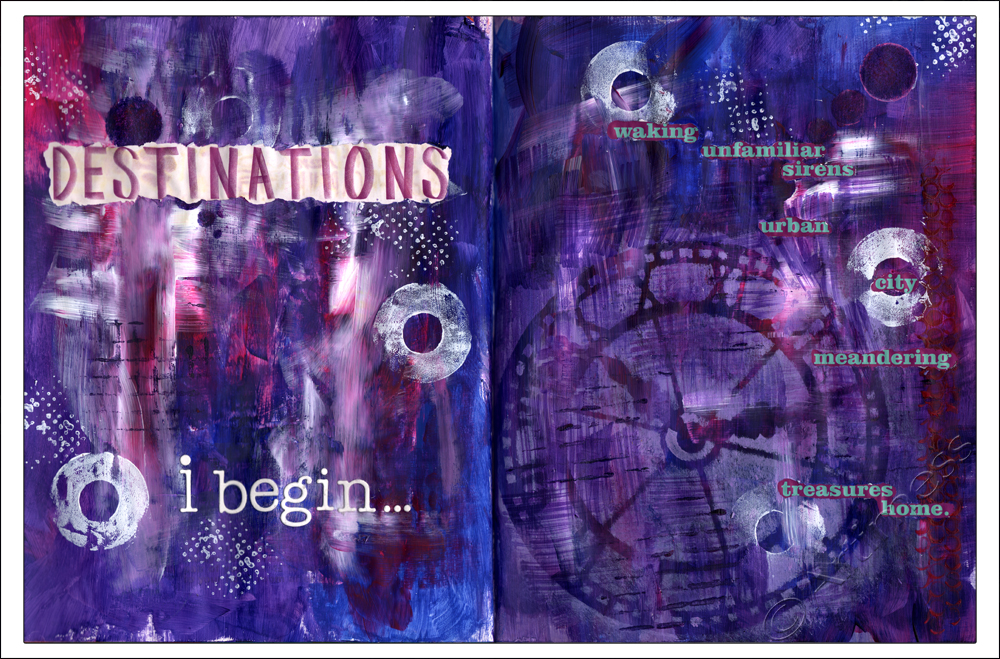
I started out by very careful covering the words I wanted to use in masking fluid. Once that was dry, I covered the pages with a thick layer of gesso, then started adding layers of acrylic paint, stencilling and stamping. When I was happy with the result, I carefully peeled off the masking fluid to reveal the words, then added my theme ‘I Begin…’ using die cut letters.
I’m off to see what everyone else has been up to now. See you tomorrow!
![]()
Blogalong with Effy!
I’ve not been blogging very regularly of late, so when I got effy’s newsletter today and saw that she was hosting a blogalong during August, I thought it would be a good idea to sign up in an attempt to complete thirty posts in thirty days!
Meanwhile, I’ve been back to playing catch up with the Life Book 2013 lessons. I started with Danita’s great class entitled Key to Freedom. The class started with a link to this cool podcast from Tarah Brach
The theme of the lesson corresponded exactly with the July Rumi Project quote over at the Glitterhood, so I had to incorporate it!
“Why do you stay in prison,when the door is so wide open?”

I started out by drawing the girl and the cage in pencil, then painted them using masking fluid before journalling on the background using a white gellyroll pen. I then painted over everything using Twinkling H2O’s. When everything was dry, I peeled off the masking fluid, coloured the girl using neocolour crayons and painted the cage with Twinkling H2O’s. Lastly I wrote the Rumi quote using a white Uni Paint Marker.
This week’s class was from Dina Wakley.
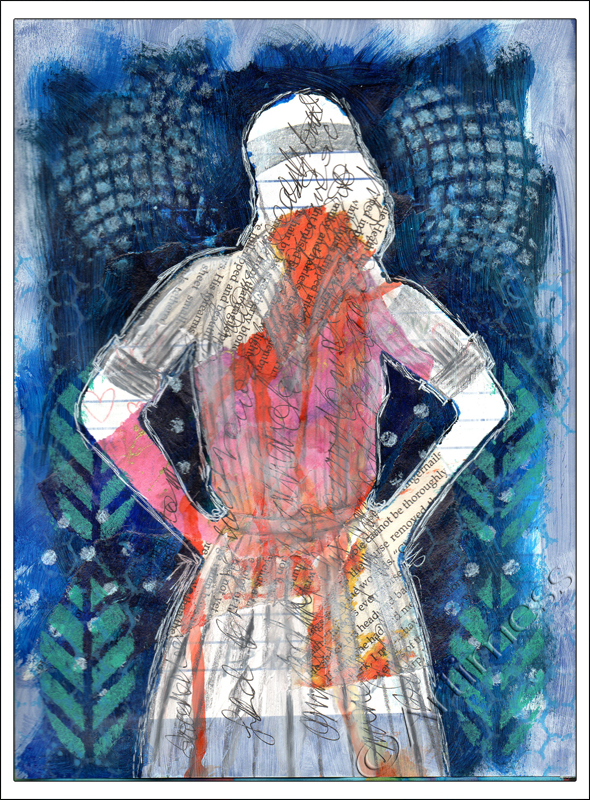
I started the page with a coat of white gesso then added some collaged book pages and old scanned artwork. Next I dripped some ink down the centre of the page and journalled across it, then placed a silhouette mask I created over the top and used acrylic paint to cover most of the page around the mask. I used stencils to add some interest to the background, and lastly, added some detail to the silhouette using a Stabilo All pencil and white acrylic paint. I found creating this page very therapeutic – thank you Dina.
![]()
Recycled Journal

Ever since I saw Rae Missigman’s ‘Go Green’ class on 21 Secrets 2013 I have been longing to have a go at making a recycled journal following her instructions. I have been an avid recycler for many years and have made use of many books in art projects, but I have never before taken one apart and reconstructed it, so this was a new adventure for me! My first step was a trip to my local Charity Shop to find a suitable hard back book to turn into my journal. These are the before and after pics!.
As usual I couldn’t quite bring myself to follow all the instructions…

… plus I didn’t have all the recommended ingredients, so I improvised a bit! The biggest change I made was to the binding. Because I had 7 signatures and my pages were quite heavy, I thought it better to use a different binding format to the one Rae taught. I used this brilliant tutorial from Sarah to learn how to do the binding the way I wanted.
But I digress! Having chosen and purchased my book for the princely sum of £1, the first task was to very carefully take it apart, removing all the signatures. Next came the fun part of decorating the cover, followed by the much trickier part of reassembling it into a book again! I started the decorating process with lots of layers of gesso, clean and painty tissues, and coloured inks dripped and sprayed. Once I was happy with that I added some scraps of material which I machine stitched very carefully to the cover – I only broke one needle in the process! Then came the embellishments which I added using hot glue and a material wrap to keep it closed. I am always envious of my American peers who seem to be able to purchase waxed bookbinding thread in assorted colours quite easily. I always end up waxing my own thread – and getting melted wax all over my cooker! With most of the book pages safely restitched within the covers I moved to inside the book.
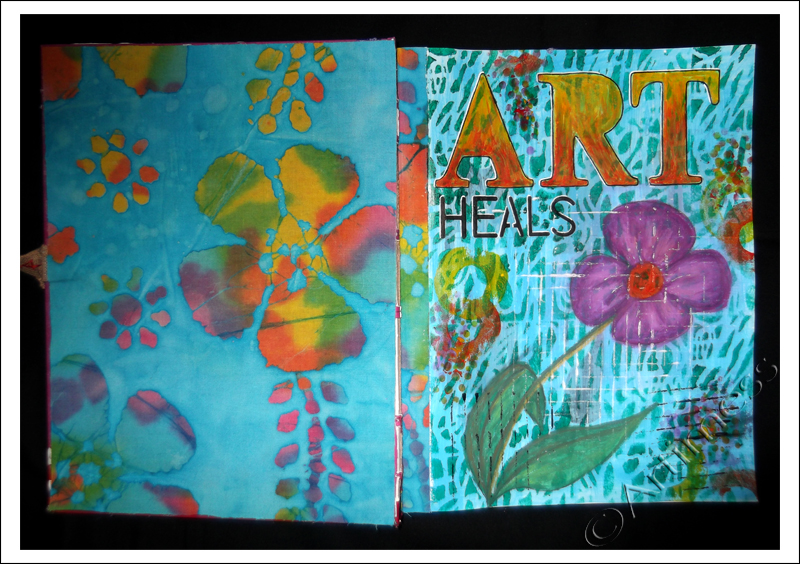
I covered the inside of the covers back and front with fabric which I stuck in using iron on fabric glue, then set to work creating a title page for the book. I started off with a layer of gesso, then added several layers of acrylic paint using a mixture of stencils and assorted stamping implements. I used letter stencils to create the titles and neocolour crayons to draw the flower.
I’m really pleased with the way the book has turned out and can’t wait to work on some more pages! Thank you Rae for a really inspiring Class.
![]()