


Finally!
Finally! I’ve at long last finished projects #5 and #6 in Kate Crane’s 21 Secrets 2013 class.

I started project #5 with a collage of printed artwork covered with acrylic paint. I used handmade stamps to add more depth then added a computer printed quotation and some grungeboard keys covered with metallic flakes. Lastly I added a metal key.

I just loved Kate’s acetate sandwich for project #6 but had great problems getting my sandwich contents to stay still. In the end I decided to use some double sided tape to keep everything in place! The quotation is handwritten on strips of cut up painted background and the leaves are cutout prints of handmade stamps. Great fun to do, and so effective!
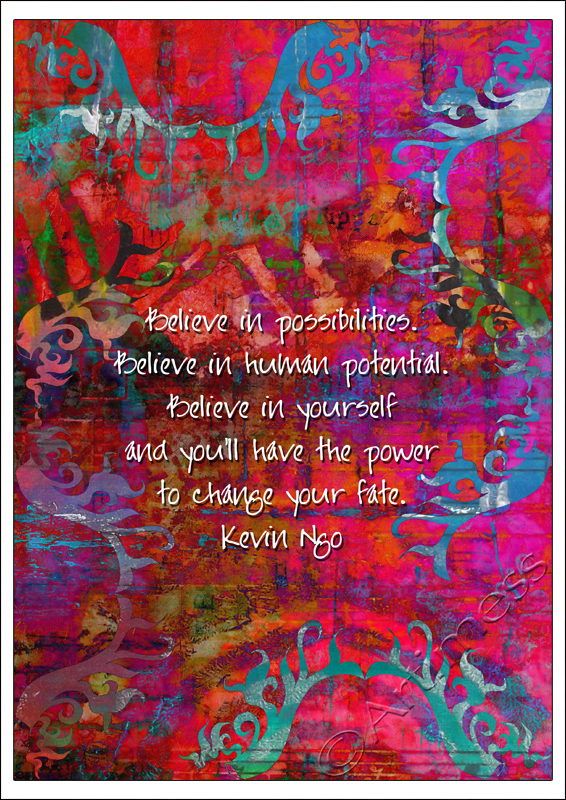
Last but not least, I thought it was time I played with digital blending again! The background is a digital blend of an artwork scan to which I added a blend of a digital brush I created from a hand drawn doodle. I really love this quotation – it’s so true!
![]()
Playing with Ink!
Project #4 in Kate Crane’s 21 Secrets 2013 class is all about playing with ink! I managed to make quite a mess and had wonderfully coloured fingers for a day!

I started off with a piece of recycled cardboard and covered it with a patchwork of torn music squares then covered that with white gesso. Next came the messy part – spraying ink. It took several layers to achieve the look I was after and Kate showed us a really cool technique which disappointingly didn’t work with my homemade ink sprays. Still I was pleased with the result I got. For the next layer I used an assortment of background stamps with colour co-ordinated distress ink pads. I have yet to add acrylic inks to my supplies, so I thought I’d have a go at making my own using golden fluid acrylics and water. It took a bit of juggling, but I managed to get quite a pleasing result which I used in a dropper to draw circles on top of the stamping. For the final layer I used Pitt Artist pens and an alphabet stencil to create my caption, and collaged a quotation from Carl Jung that I printed on my computer.
Just two more to go now!
![]()
Handmade Postcards
Last Sunday we travelled to Harrogate and visited the Great Northern Papercrafts Extravaganza – great fun! I got some really cool stencils, stamps and dies which I have been playing with this week.
On Monday I signed up to take part in the iHannah’s DIY Postcard Swap 2013. (There’s still time to sign up if you’re interested, you just have to pledge to post 10 handmade cards by 30th March.) So I have been busy this week making my ten cards for the swap.

I started by creating a set of coloured backgrounds using Inktense Watercolour pencils. Next I added a contrasting colour using Acrylic paint and an Artist Cellar Stencil followed by a stamped image from IndigoBlu using a mixture of distress ink and staz-on ink pads. I followed this with a layer of gel medium to seal everything and to stick on the word definition tags, which I created using more stamps from IndigoBlu and a Creative Expressions stencil, and the die cut letters from memory box. Lastly I added another layer using the same stencil with acrylic paint.

I created the backs of the postcards using a free postcard backside from iHannah which I had to resize to fit my postcards, then added a digital stamp which I made using a scan of another Creative Expressions stencil, some hand drawn bird shapes and a quotation from Friedrich Nietzsche.
The completed postcards are now sitting waiting for their recipients addresses to be added!
![]()
Mystery Muse
Now that February is over and my Mystery Musee has safely received her gifts, I can show you what I’ve been up to! I took part in the Artella Mystery Muse 2013 Project; you submit your details and a word which sums up the year for you and get given in return a “Mystery Musee” person to send two hand made gifts to in the month of February. I had great fun making gifts for my “Mystery Musee”.

The first gift I sent was this collaged playing card with her word for the year on the back enclosed in the altered envelope.
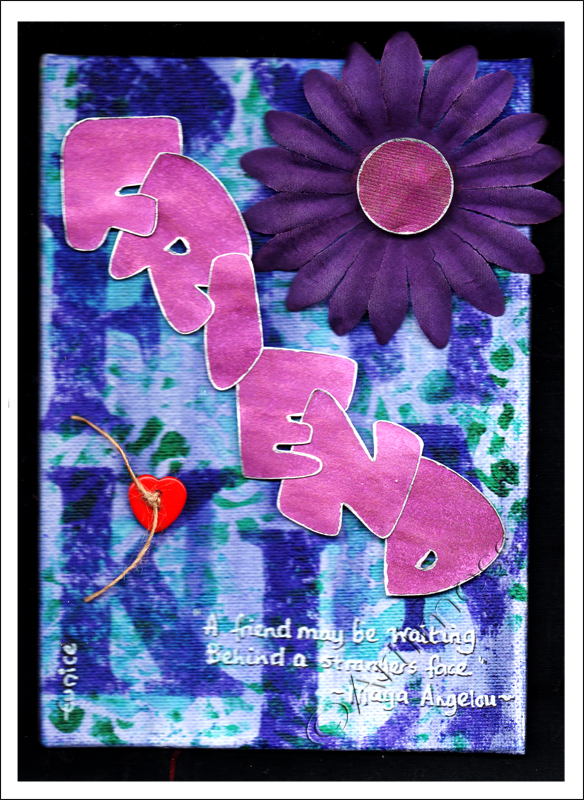
For her second gift I made this canvas board collage using letter stencils and a quotation from Maya Angelou.
In return, I received 2 beautiful gifts from a different person who had been given my details. It was so lovely to receive surprise ‘snail mail’ and inspirational to see another persons work in this way. I will definitely be signing up for this challenge again next year, and will be looking out for other hand made/artwork exchanges during the rest of the year. Do you know of any?
![]()
Dance!
I’m still having great fun playing with Carolyn Dube’s free Use Your Words workshop. Today I finished Wednesdays assignment.
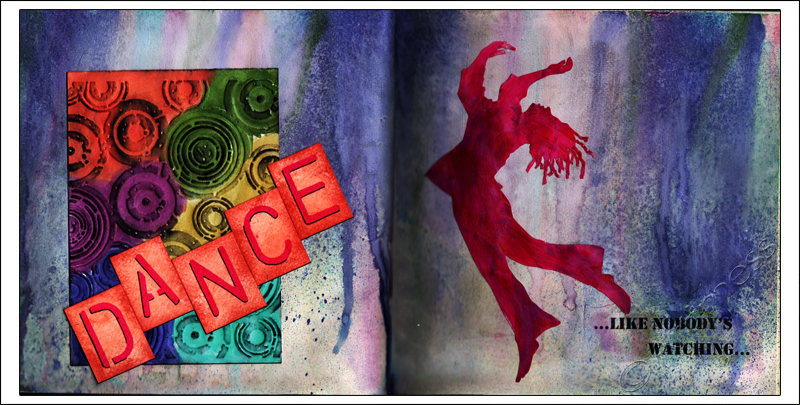
I started by printing the quotation and gluing it to the page, then added colour using a mixture of dripped and sprayed Twinkling H2O’s – very messy! Using the same colours, I painted a panel which I’d embossed using a gear embossing plate, then brushed it with a black staz-on ink pad to give it some extra depth. I created the word dance using a plastic letter stencil then cut the letters up and taped them together. The dancer I cut out from a computer image and painted using acrylic paint.
It was a very messy project, but I had great fun with it!
![]()
Colour!
I’ve been having fun with Carolyn Dube’s Use Your Words workshop again. This is Mondays project.
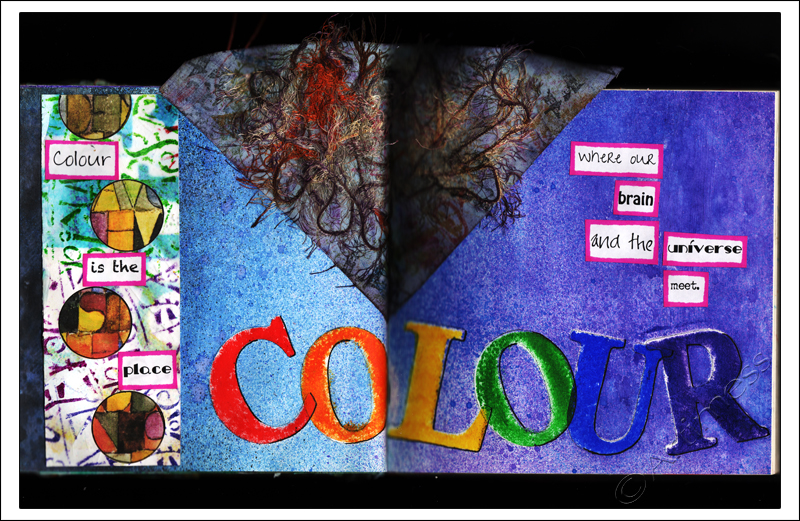
I started off creating the word ‘colour’ using my homemade stencil and acrylic paint, then masked the letters while I created the background using spray inks. Next I took a piece of yesterday’s background sheet with circles punched out of it and added a computer generated image behind to add depth. I created my quotation on the computer and cut up the words. I added shadows and outlines using a uniball eye pen and a sharpie marker.
Lastly I added a material and thread piece with has been sitting in my cupboard waiting for a new home for about three years (how’s that for using up odd bits!). It’s a bit bigger than the page, but I quite like how it sticks up at the top! What do you think?
Leftover Paint!
Whenever I have any leftover paint on my pallet at the end of a project, I brush and /or apply it randomly to a page in my notebook then scan it into the computer.

Today I started off with a scan of some leftover acrylic paint then added the Socrates quotation using digital text. A nice easy day after yesterdays mammoth effort!
![]()
Thanksgiving Leaves!
Remember me saying I had loads of leaf print images to use up? – well here are two more! Although we don’t celebrate Thanksgiving here in the Uk, I kind of wish we did. So I added a quotation which I think says it all.

I used my home-made font, ‘Handwritten’, from yesterday for the quotation. In case you missed it yesterday, here’s the link again HANDWRITTEN if you want to download it :).
The background is a digital blend of two more of my leaf print images which I created using acrylic paint.
![]()
More Cling Film!
Following on from yesterday, I thought I’d create a background on glossy card using the distress ink pad and cling film technique.

When I saw how it turned out, I decided to scan it, add some digital brushes which I created from a couple of my own photos and the Thich Nhat Hanh quotation.
![]()
Let us not…
I’m still ploughing my way through my pile of leaf prints from the end of September. Today I decided to add a quotation using digital text to this one, and a bit of digital blending for good measure!

The original image had an acrylic paint background with acrylic paint leaf prints on top.
![]()